Configure Facebook Lead Ads
In the Configure Facebook Ads page, we described the steps involved in configuring the Facebook Ads, if the web form submissions are occurring on your web site.
However, if you are using Facebook Lead Ads to capture Facebook form submissions directly in Salesforce as lead records, then you can configure the AdIntel App to also support this use case.
Following are the steps involved to setup the AdIntel App to support Facebook Leads Ads:
- Create a text custom field on the Lead object in Salesforce to store the Facebook Ad Id. Following is an example.
- Custom field label : Ad Id
- Custom field API name : Ad_Id__c
- Configure the integration that you are currently using (Zapier or Facebook Salesforce Lead Ads connector or another tool) to ensure that (a) the Facebook Ad Id is mapped to the Ad_Id__c field and (b) the LeadSource field is set to the value Facebook. The goal is that every time a Facebook Lead Ads lead is created in Salesforce, we are also capturing the correct lead source and ad id values.
- The last step is to configure AdIntel to work with the above information.
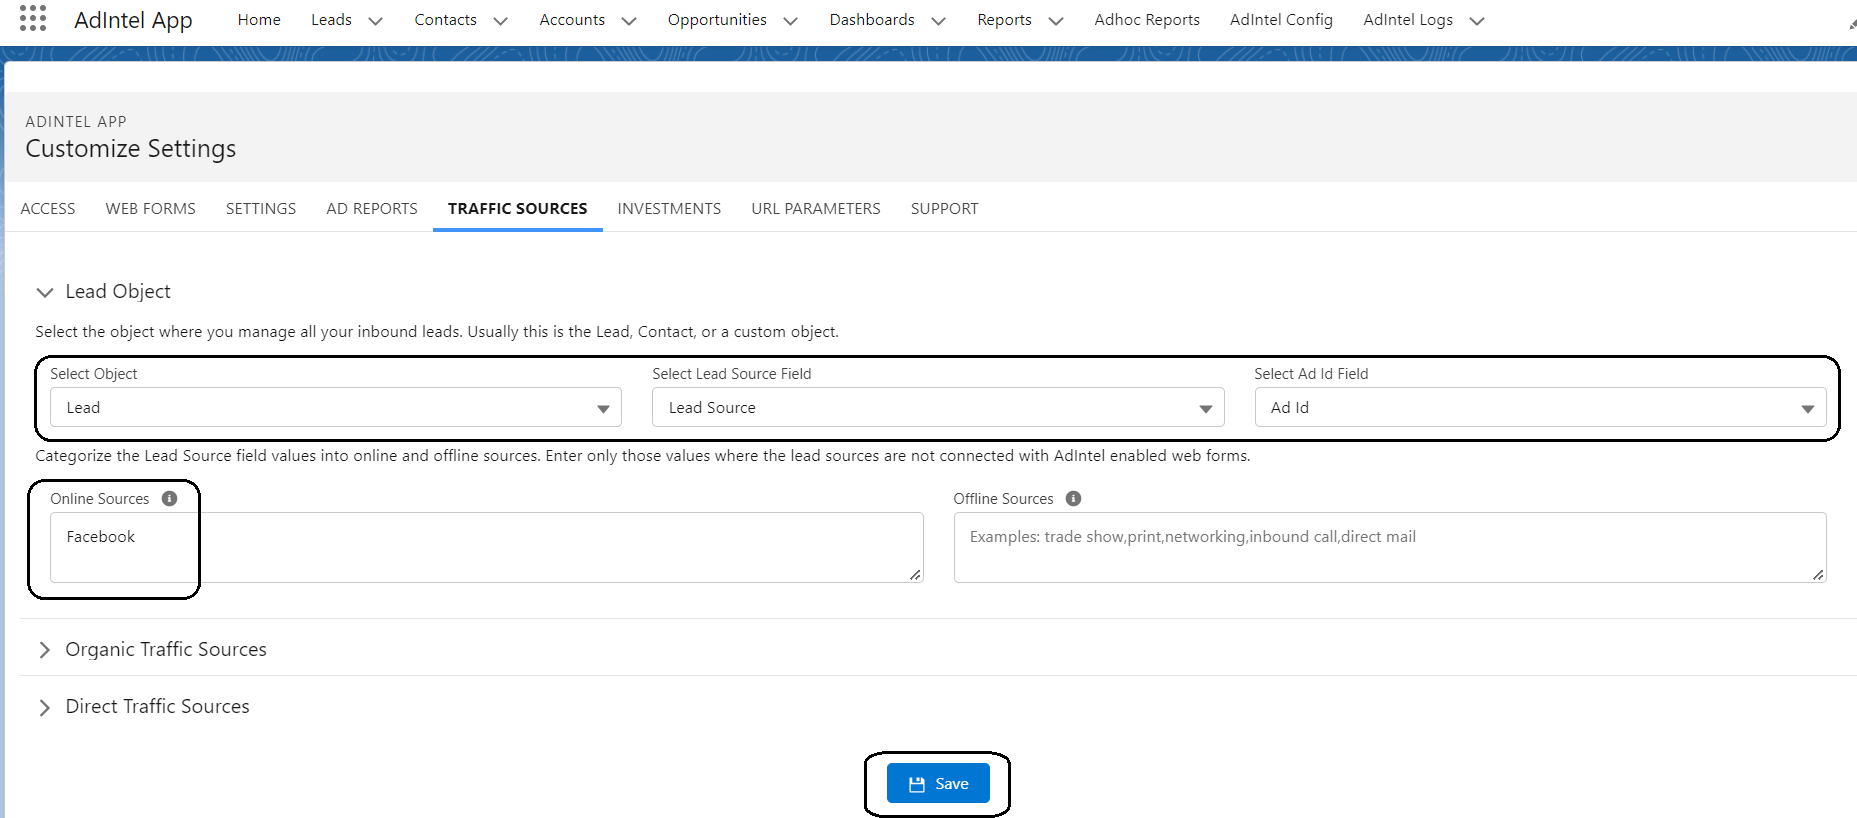
- Go to AdIntel Config tab in Salesforce, and select the Traffic Sources sub tab.
- Define the Lead Object, Lead Source, and Ad Id fields as shown below.
- In the Online Sources section, add Facebook.
- Scroll down and click the Save button to update the configuration.

You are done. The AdIntel App will now start tracking the Salesforce leads coming in via your Facebook Lead Ads Salesforce integration.
