Local Time – Installation and Setup
NOTE: You need system administrator privileges in-order to properly install and configure the Local Time App in your Salesforce Org.
Local Time App listing on Salesforce AppExchange
Login to AppExchange with your Salesforce Production Org credentials and select where you want to install the App.
To install the App in your production org, click the Get It Now button from the Local Time App listing on Salesforce AppExchange.
To install the App in your sandbox org, click the Try It button from the Local Time App listing on Salesforce AppExchange. We recommend that you first install the App in your sandbox org, test the functionality before installing it in your production org.
Go through the following steps to install the App properly in your Salesforce Sandbox or Production environment.
If you chose Sandbox, you may be asked to login with your Sandbox org login credentials.
If you chose Production, you may be asked to login with your Production org login credentials.
Step 1 – Accept the terms & conditions and then click on the Confirm and Install button.
Step 2 – Select the Install for All Users option and click the Install button.
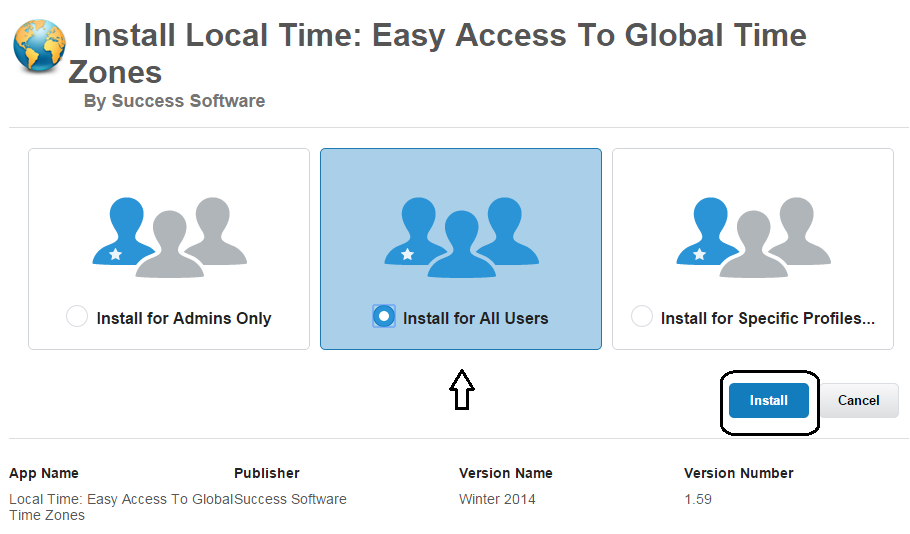
NOTE: The above process can only update profiles. If you are using permission sets, Salesforce does not update them automatically. After the app is installed, please refer to configure profile settings to update all the relevant permission sets to ensure proper access to the app’s functionality.
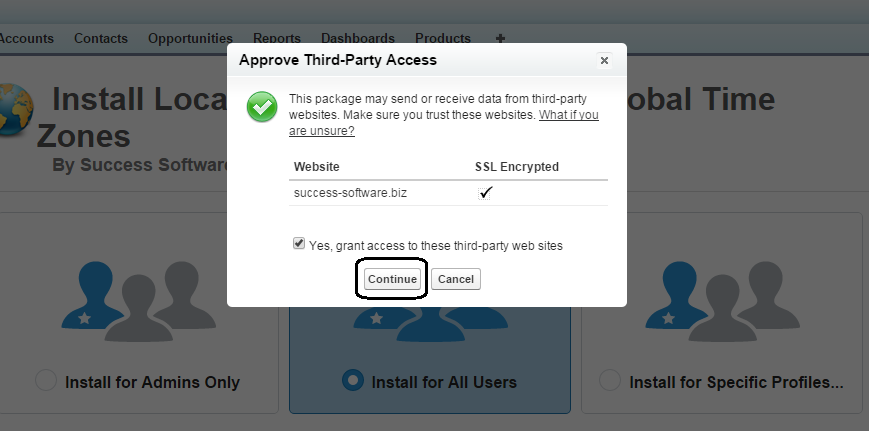
Step 3 – In the Approve Third-Party Access popup window, select “Yes, grant access to these third-party web sites” checkbox and then click the Continue button.
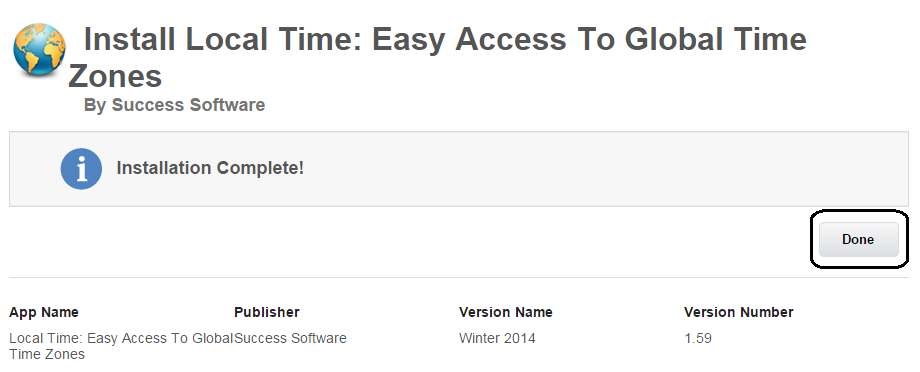
Step 4 – Wait until the Installation complete screen appears. Click the Done button.
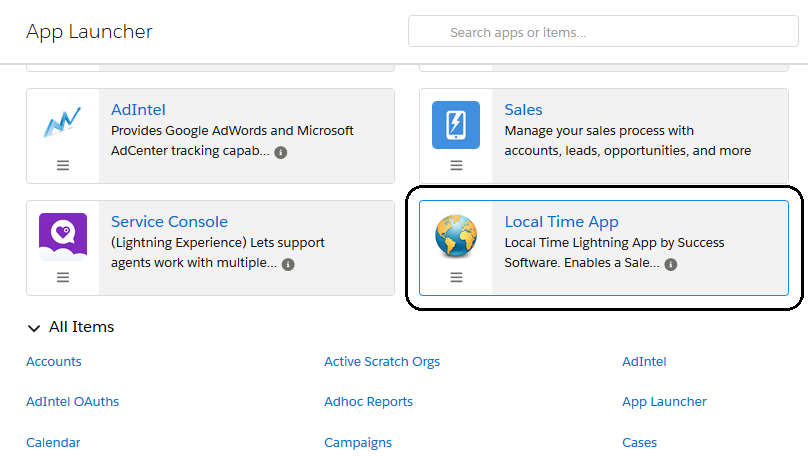
Step 5 – From Salesforce Lightning Experience App Launcher, select the Local Time App to setup the app.
Step 6 – Click the Local Time Config tab and review the values for different options. Click on the ![]() icon in case you need explanation for each of the options. Then click the Save button. Clicking the Save button is an important step and thus must be performed atleast once after the App is installed.
icon in case you need explanation for each of the options. Then click the Save button. Clicking the Save button is an important step and thus must be performed atleast once after the App is installed.
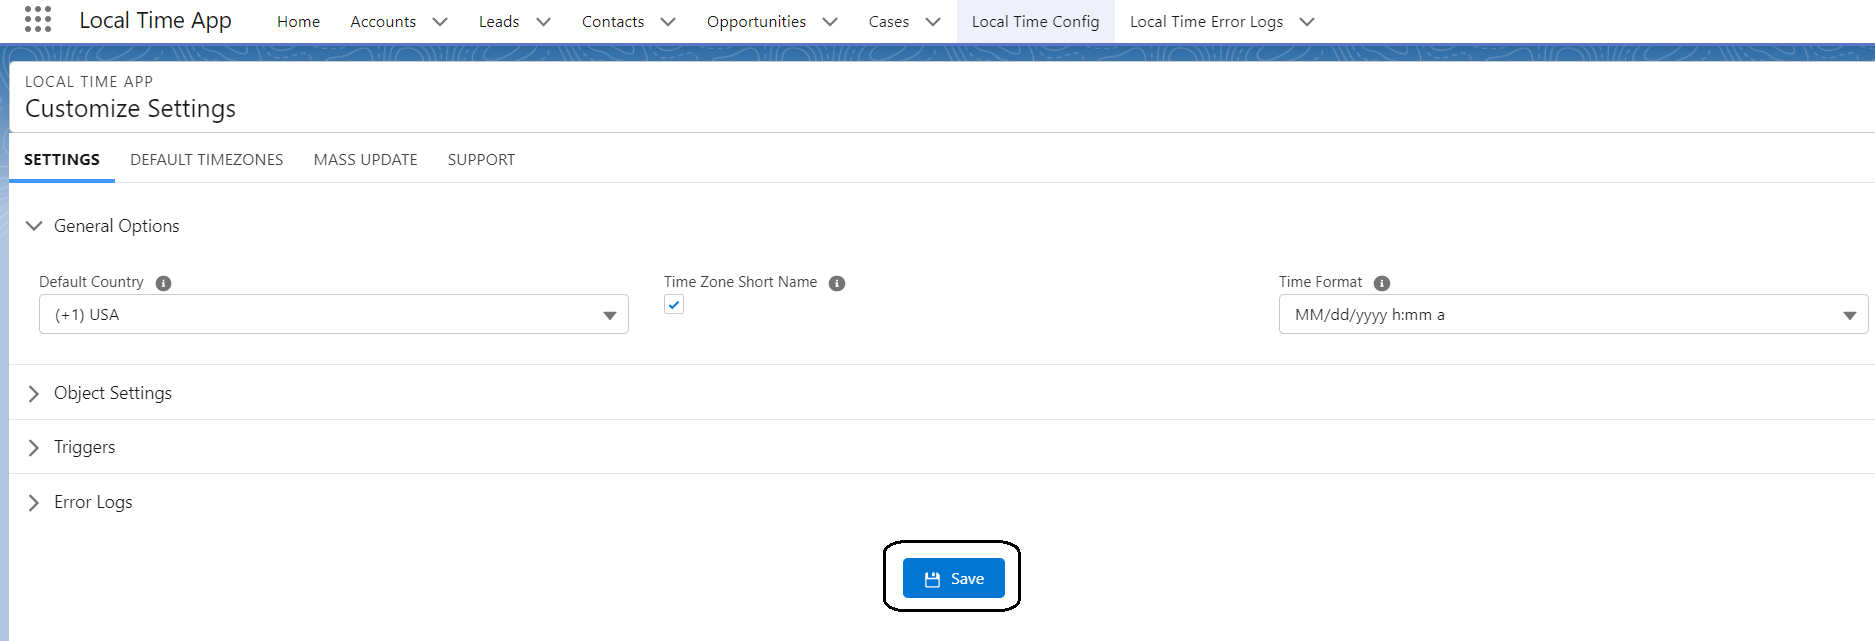
Step 7 – Data Warm-up. The timezone information is initially not available on the records created prior to the installation of the App. Thus we recommend that you do a one-time mass update of these old records. You can do so from the Mass Update subtab, as shown in the Local Time Config tab (See the screenshot in Step 6). You will see the timezone information for these records after this update step is completed. The Local Time Error Logs tab will give you information about any errors encountered during the update of any of these records.
Step 8 – Manage Licenses. Perform this step when you are ready to add other Salesforce users to use the App. By default, only the System Administrator that installed the App has access to it. Note that this step is relevant only in your production org. If you installed the App in your sandbox org, all the users in your sandbox org are automatically granted access to the App.
Go to Setup -> Apps -> Installed Packages. Then click on Manage Licenses link next to the Local Time App. Add all the relevant users that need access to the App.
NOTE: The free trial in your production org is valid for 30 days and is limited to 10 users. All the users in your Salesforce production org will have access to the App automatically, once a valid license for the App is purchased.
Step 9 – Please click the Next link below to customize the App.
